Tuesday, March 2, 2010

Critters In My Yard

Once again, I had the best of intentions to stay on top of back yard maintenance over the winter, and once again, I did not. As a result, I have a hideous oxalis problem. This stuff only grows int he rainy season, but if you turn your back on it, it will grow several feet tall before you know it. The worst part is that letting it grow helps it feed the bulbs that will produce next year's crop. Three winters of neglect have given this weed a hefty head start.

Two weekends ago I made a trip to the garden center after weeding the veggie bed area. I worked on it for a few hours and barely made a dent in the problem. I thought I might need to call in the big guns (read: chemicals) to tackle the rest of the yard. I don't like using chemicals, but clearly the pulling isn't working since the one area I've really worked on controlling over the past three spring seasons is still having problems.

The gal at Wegman's (I swear they are the BEST garden center around) told me that my best bet is to pull the weeds EVERY day and the earlier I catch them, the less chance they have to produce and feed more bulbs. Maybe after a few years the problem might be under control. My response was, "Um, I have a job. And a life. What are my other options?" Next in line is a technique called sheet mulching. this is where you mow it all down as short as your mower will go. Then you lay sheets of cardboard or lots of layers of newspaper down on the ground and make sure it is overlapping well so that there are no cracks through which this stuff can grow. Then you spread 1" of compost and another 1-2" of mulch. the idea is that it totally smothers the sprouts and if it can't grow leaves that can conduct photosynthesis, it can't produce and feed baby bulbs. After several months, you come back and roto-till the whole yard and--voila! perfectly fertile, weed free soil. The only catch is that in severe infestations it may need to be repeated.

I pondered this and thought that maybe I will pass on that effort this season and start the sheet mulching in the fall when this icky stuff would be starting to grow again. Meanwhile, I kept pulling the weeds. In so doing, I discovered that my yard is not only home to several types of salamanders (I have seen and identified Arboreal and California Slender), but to a toad/frog as well:
Since I had disrupted his home in the patch of oxalis, I built a little toad house out of flower pot (turned it on its side and stuffed a bunch of leaves and such into and over it). i hope he intends to stay and start a family.

I also noticed that I now have a healthy worm population. The past two seasons I've thought my worm population was deficient and contemplated adding some to my veggie bed to help improve the soil condition. Nice to know that is not needed this season.

In any event, these three data points reminded me that avoiding the widespread use of chemicals is the right choice. The herbicides might have an unintentional negative impact on the ecosystem supporting my beneficial creatures, so I'll stick to weed pulling for now. The jury is still out on whether or not to do the sheet mulching now, or wait until the fall.


Friday, February 12, 2010

I'm Not Completely Slacking...

Forgive me, dear readers, it's been 8.5 months since my last posting. The later half of 2009 was filled with even more challenges than the first half, and though progress at The Dump continued, blogging did not. I will quickly bring you up to speed.

Garden:
My crops got off to a good start, but took a hit due to a prolonged absence in August. An automated sprinkler system is on the agenda for this year, even though that makes it difficult to utilize my rain barrels (which, BTW, are already full for this season). Hmmm. I'll need to ponder a solution for that. However, I did learn that zucchini and yellow squash are abundant producers, even with minimal attention, tomatoes are not so forgiving of inconsistent watering, I needed about five sugar snap pea plants instead of one, cucumbers and melons are not something I will try again and corn is not worth the space it takes when I can get big juicy ears from the farmer's market (my six stalks produced three ears, all of which were about 4" long).

Painting:
Well, I got the front finished, and a bit of each side (the bits that are visible form the street!), and that's about it. Definitely need to pick up the pace this coming summer.

Kitchen:
There has been A LOT of progress in the kitchen, which of course pleases me to no end. after all, the kitchen is the proverbial heart of the home, and as most of you know, I do like to spend my free time cooking and baking.

Along the way in The Dump's history, someone thought peel and stick vinyl floor tile would make a good backsplash behind the sink. You can sort of see it in the first photo of this post. That was a lazy attempt to avoid installing new window casing trim after pulling out what I suspect was some funky 50's tile backsplash. Well, those damn vinly tiles kept popping off, so finally, in a fit of irritation, I started to yank them off. However, that revealed that the self adhesive was not enough and so the installer used some construction adhesive, leaving a gooey mess that could not be removed, even with the strongest solvents. Unable to decide what to do with that, I just lived with it. For a year. I finally decided that some beadboard paneling would work nicely:

You can see some of the adhesive on the side walls because I couldn't (still haven't) figured out how to tackle getting the paneling to play nicely with the irregular gap between the counter and the wall. I decided not to paint it blue (little color swatch at lower left of window), and instead painted it the bright white of the trim and what will eventually be on the cabinets. Please note the lovely new trim on the window. Yes, I can rock the miter box.

However, the biggest improvement in the kitchen to date is the new floor I installed during my five weeks of furlough in Nov/Dec:

I ultimately want to salvage the hardwood under the two layers of hideous 70's vinyl tile and rocking 50's sheet lino (see below for the detailed photo of the layers), but I couldn't handle removing both layers at this time, unsure if the HW is even salvageable. But I just COULD NOT take any more of the ugly yellow and brown-ness, so I opted for some cheap and cheerful faux stone vinyl tile, adhered right to the 50's sheet.

OTHER:
I did some super-badass reglazing of some windows that were in bad shape, but that doesn't have much visible wow factor, so I have no photos. Suffice to say that I did feel very proud of myself for accomplishing that project and will be attempting further window repairs in the spring.

While handing out candy on Halloween, I met some neighbors for the first time (Jana, husband whose name I cannot recall, and their A-dorable little boy, Joe). They live across the street and a few houses down in a super-cute house with a very tidy yard. Jana made my day by telling me "Your garden always looks so nice with all the flowers you have, and your tulips last spring were spectacular." Little do they realize I am plotting to overthrow them for the "cutest house on the block" award. However, since this is what my next door neighbor's front yard looks like, I don't think I'll have much competition:

Wednesday, May 27, 2009

Big Summer Project Has Begun

A few weeks ago, I had the thought that perhaps I should paint the exterior of The Dump before the next rainy season as there are some areas where the paint has failed and bare wood is exposed. I wondered how long it would take me to do this by myself as asking mom to help would be far different than asking for her help on an interior painting project.

Imagine my surprise when she pulled into the driveway mere days after I'd had that crazy notion and the first thing she said was, "We should paint your house this summer." I wasted no time on taking her up on that offer! We pulled paint chips that very day and narrowed it down to what I thought was a good color. Samples proved otherwise, so the color selection process continued.

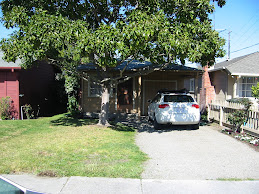
Since I have a series of 3-day weekends coming up (Memorial Day, 4th of July, and a bunch of random Fridays we now have off as a token remuneration of our recent pay cut), I decided to get moving. Here are some progress pics from this past weekend:

Saturday - Scraping (not much since I have lead paint under there), patching and attempted gutter removal. Discovered the gutters will not come off AFTER we had demolished the downspouts int he removal process (oops!). No photos of this since it looked even uglier than before. Color was still uncertain at this time.

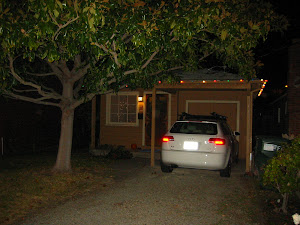
Sunday - Everything is primed and ready to go. Color rapidly selected and paint purchased (since the paint store would be closed on Monday). You know it was bad when a passing neighbor is totally impressed by the primer coat:
Monday - Eaves, rafter tails, fascia board and gutters painted white (with the "help" of my new power painter. Very messy, but good for getting into all the nooks and crannies of the eaves. I could not have done it without the help of a crew consisting of Mom, Uncle Tom and my beau, AT--thanks everyone!), window and garage door trim painted green so I could get the padlock back on the garage door:
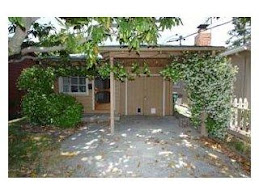
Tuesday night (wanted to snap a pic before I ran out of daylight) - Yellow done on front wall so that I could unmask the front door:
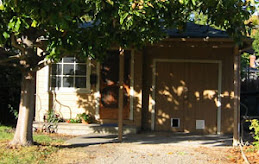
Wednesday morning - All cleaned up, unmasked and looking perky in the morning light:
Obviously, there is still a lot left to do, and this is only the first side of the house! However, it's a massive change and I think it will go a long way in boosting The Dump's curb appeal.

Once again, I'm reminded of the transformative power of paint. I heart you, paint!

Sunday, May 10, 2009

Yard work

So, it's been a while since I last posted, and I've been really busy in that time.

I painted and laid a new vinyl tile floor in the laundry room but I don't seem to have any real photos of that. I know I took some with my phone, but they aren't blog quality, so you'll just have to wait.

The weekends of the past month have been focused on the yard (aside from the weekend I lost to a business trip). Namely, I was keen to get my veggie bed going so that I will have some chance of having something edible before the season ends. I spent a weekend pulling weeds and working the soil and then planted the following weekend.

I went a bit crazy at the garden center:
6 types of tomatoes
a 6-pack of corn
a 6-pack of basil
Parsley
1 Cucumber
1 Zucchini
1 Crooked neck squash
1 sugar snap pea
1 watermelon
a 6-pack of lettuce

I'm pleased to say that I made it all fit:


Also a few weeks ago, I discovered buds on scraggly rose that I had pruned in January 2008, but had largely ignored since then. This weekend I got a pretty trellis and tied it up to the end of the front porch:

Cute, non?

And to round out this yard-loving post, my CA wildflowers are late to bloom, and not as well synchronized as I had hoped, but pretty nonetheless (I had wanted an explosion of blue lupine and orange poppies together, but the lupine is almost finished and the poppies are just beginning to open):

Sunday, March 22, 2009

It Pays to Have a Friend Who is an Artist

I know with absolute certainty the shade of green I want to paint the kitchen in the final remodeled version with white cabinets, dark hardwood floors and my lovely "Cashmere White" granite I picked last February. Alas, with the economy as it is, that is off the books until some time in the uncertain diststant future. The kitchen desperately needed a paint job to be less dumpy and more tolerable until the remodel finally happens.

Picking a color has not been an easy task. The reason for this is that there is a complex set of variables to influence this decision. In one corner, I have the new white cabinets with honey colored beech butcherblock counterop. In the other corner, I have the dingy old cabinets with a cheap blue formica counterop. Underfoot is a hideous yellow/brown/olive linoleum tile that I plan to replace with a pretty stone-like linoleum tile when I can afford it (see previos post about recent pay cut coupled with some emergency expenses). The adjoining living room is a muted yellow that sometimes looks olive.

Back in October, I found what I thought was a pretty blue for the living room. It was way too cold for that room since it gets very little light. I slapped up some swatches in the kitchen, and while it blended with the formica quite nicely, I was certain it would be positively FROSTY in there if I did the whole room.

I'd pull a few paint chips on every trip to the hardware store, and amassed quite a stack of them. I have been staring at those chips for the kitchen for at least 3 months with nothing really standing out as the obvious choice. All the greens I picked seemed to clash with the blue, all the tan/taupe/brown/beige looked sickly next to the butcherblock, and nothing was going to make the hideous lino look any better.

This weekend I finally had two full days to commit to the project and got started with priming ceiling and walls, then painted the ceiling, all without having a clue what color to pick. I had somewhat resigned myself to the fact that it likely needed to be blue, and was leaning toward a really pretty, saturated, bold blue that was not dark (basically, as warm a a BLUE can be, which is not very)

Then I called my friend Billy (the artist) and asked him for a consult. I brought with me my stack of paint chips, a sample chip of the formica that I picked up at Home Depot, the chip of my living room color, the four contenders of replacement floor tile, and pried up a loose tile of the current linoleum (we used the hardwood floor at his house to approximate the butcherblock).

Billy, Kat and I looked at color combos for probably an hour. Amazingly, Billy was able to find not one good choice, but THREE amazing choices. All green, all lovely next to the blue, existing lino, and future lino (helps to have that decision made now too!). We identified them as "bright and perky," "tranquil and safe" and "potentially dark and moody."

I dashed home and taped them all to the wall that is visible from the living room. I looked at them for 10 seconds and made up my mind. The "bright and perky" choice (appropriately named "Gleeful Green") seemed like it might be TOO perky for my little space, so I chose the "tranquil and safe."

Not only did Billy give me the cheery green kitchen I had been hoping for, but he also paired each green with a suitable blue that I can use on the wall behind the formica counter to tie it all together and add some interest. Amazing!

After all that description, here are a few pictures of it after the first coat:


OK, time to go start the second coat!

Tuesday, March 10, 2009

Unplanned Improvement

Last Tuesday night I went through the laundry room to go out the side door and thought, "Wow, it's really warm and humid in here." That was quickly followed by, "I'm not running laundry" and an inspection of the water heater. Sure enough, it was leaking. Fortunately, it had a drip pan under it, so I had not flooded the inside of my house. I promptly hopped in the shower to 1) shower and 2) use up all the hot water in the tank before I turned it off.

I booked several plumbers to come out on Wednesday to give me quotes and the one I booked could not make it out until Friday to do the installation. Even without hot water, I decided to wait for him anyway because he was great. He listened to my concerns of conventional vs tankless now (Cha-ching! 3x the cost of conventional at a time when $$$ is already tight due to a recent pay cut) vs wasting the money and a perfectly good water heater when I finally get around to the big remodel. His opinion was don't do it twice, and do the installation of the tankless in a place that will be compatible with future remodeling. I was sold.

Anyway, when they came out to do the installation, they pondered how they were going to get the old unit out with the utility sink in the way. I told them I'm not at all attached to the sink and use it only because my washing machine drains into it. They could remove it to make it easier to get the old tank out, IF they would help me set up a standpipe for draining the washer. They paused and said, "We don't usually do that since we do just water heaters, but since it will make it easier on us, we'll do it for you," and then told me what supplies I'd need to get.

It took all day, but the added bonus is that my laundry room is suddenly VERY spacious. I'm gearing up to paint it and the kitchen in the coming weeks and then will install some cupboards/shelves in the nook where the old water heater was and will suddenly have a massive amount of storage for pantry and cleaning supplies. I can't wait!

Sunday, February 22, 2009

Sometimes I even impress myself

As I have mentioned several times, The Dump suffers from a lack of gutters on two sides. This leads to a lot of water hitting the ground and sitting there right next to the foundation. This means it makes its way into the crawlspace, which has been the source of much stress and frustration. It REALLY stressed me out last year, and this year I was trying to tell myself I was prepared for the inevitable cycle of rain and pumping.

Back in late summer, I thought to install gutters before the rains started, but didn't because it seemed very likely I'd do my foundation work (including a super powerful system to remove water from the property) and a new roof. Alas, the economy tanked way more than expected and I decided I needed to keep that cash in my pocket.

After the doozie of a storm we had last weekend and the out-of-control stress I felt this week with all the pumping it required, I decided I needed to get some gutters up before the next storm rolled in. So, I downloaded some how-to info from ThisOldHouse.com, went shopping for supplies Friday night and skipped my run Saturday morning to get an early start on what I suspected would be a long project.

I have to admit, I consider most of my home improvement projects thus far to be pretty entry level and was a bit concerned about my ability to execute on this one. But execute I most certainly did. Because I was racing against mother nature, and my doubt about taking on a project of this magnitude, I opted for the slightly more expensive vinyl gutter system that snaps together with rubber gaskets at the joins instead of cementing with metal or plastic adhesive. So easy!

I got about 40' of gutters hung without too much cussing and without falling off the ladder. I ran out of gas and did not finish the task (have a 12' and a 7' section left), but am really pleased with what I accomplished.

Sure enough, it started to rain while we were out to dinner and I could not wait to get home to see how they were holding up. Instead of a waterfall off the roof, I heard water gushing down the downspout and out the end of the 12' diverter tube that takes it away fromt he foundation. Yippee!!!!!

It rained most of the night and a good chunk of today and my crawlspace is NOT full of water as I was expecting it to be. Maybe we didn't have enough rain to create saturated conditions (though he soil was still saturated from the last storm, even with 4 dry days in between) , but maybe the gutters are a big chunk of the solution to my water problem. Not bad for $150 in supplies and 6 hours of work.

And because I am THAT much of a geek, here's a photo:
On tap for next weekend: painting the kitchen.